
We use the excellent MunkiReport-PHP project for reporting and tracking on our Mac fleet. If you’re experienced in PHP, setup is a breeze – if this is your first PHP rodeo, you may need some more pointers. Here’s a quick walk-through of how to set up the application on OS X Server. I’m using 10.12 Sierra and Server 5.2, but this should apply to any of the 5.x series Server apps.
- Log in to your server via Remote Desktop, or sit down at a local keyboard with it. It will be much easier to do the install this way.
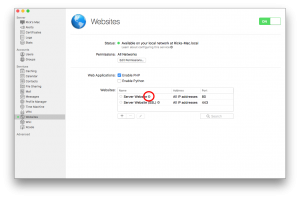
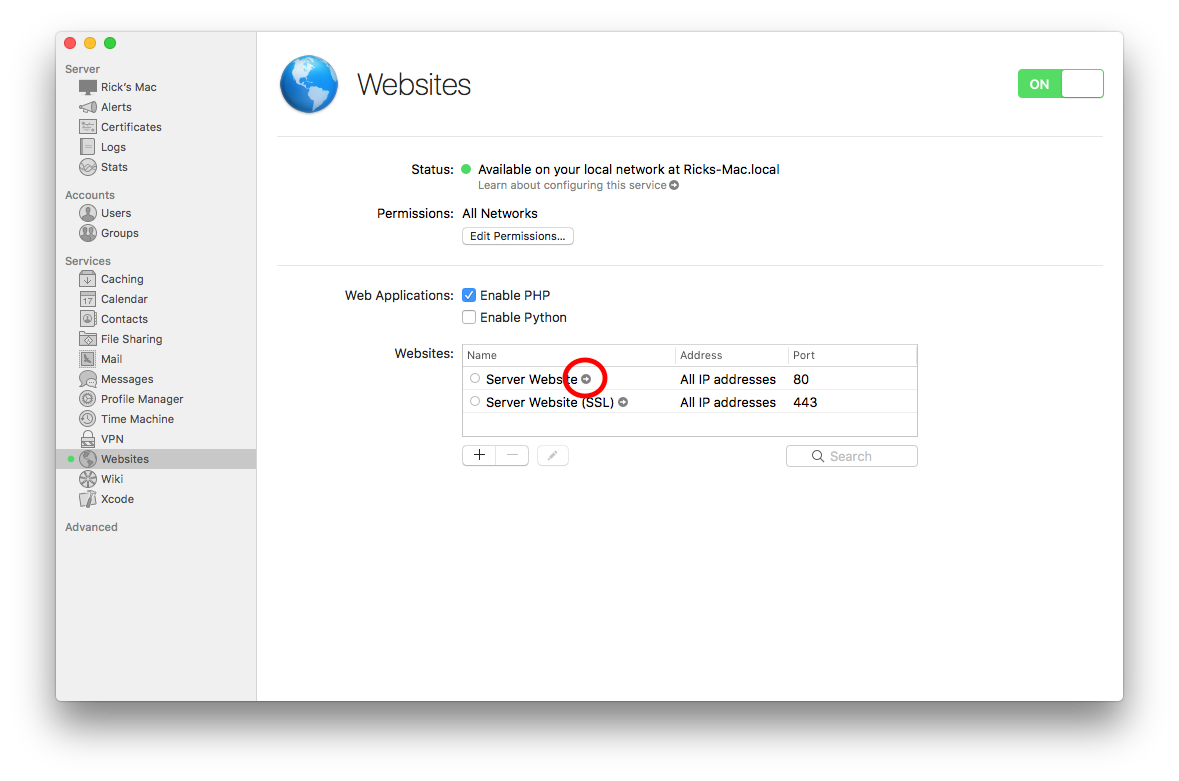
- Open the Server app and navigate to the Websites panel.
- Check the box for “Enable PHP” under Web Applications.
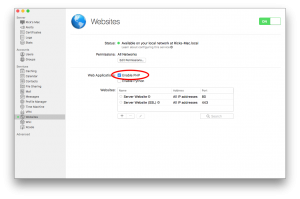
- If munkireport-php is the only thing this server will host, click the little arrow next to “Server Website” to open the web root directory in the Finder. If you are hosting multiple sites, click the + button and add an entry for a new site with the URL of your choice. Then, click the little arrow next to it to open the web root directory in the Finder.
- Download and unzip the latest release from the munkireport-php Github page. Copy the files into the web root directory that opened in step 3.
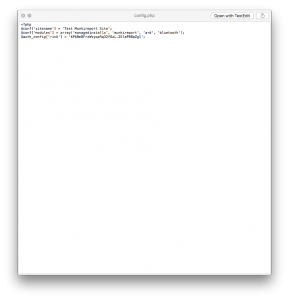
- Copy the config_default.php file to config.php and open it in a text editor that is NOT TextEdit (I like TextWrangler). This is because TextEdit will use smart quotes, which will make PHP throw all sorts of syntax errors.
- Open up the config_default.php file in another window right next to your new config.php file. Delete everything except the first line of config.php. Munkireport reads in both of these files – the only lines you need to put in config.php are ones where you’d like to use something other than the default setting.
- Copy any lines you wish to change and edit them as you wish. For example, you can change the site name, add modules to be processed, define custom dashboards, etc. In general, you will at the very least need to add the modules you want your computers to report in with. You can see the list of these by going to the web root directory under the “modules” directory – simply follow the format of how config_default.php has them to add more. Here’s an example config.php file – don’t worry about the last line yet, we’ll get there.
- Save the config.php file, but don’t close it yet!
- Add a DNS entry so that your website works – this depends entirely on how you have your network set up and isn’t in scope here.
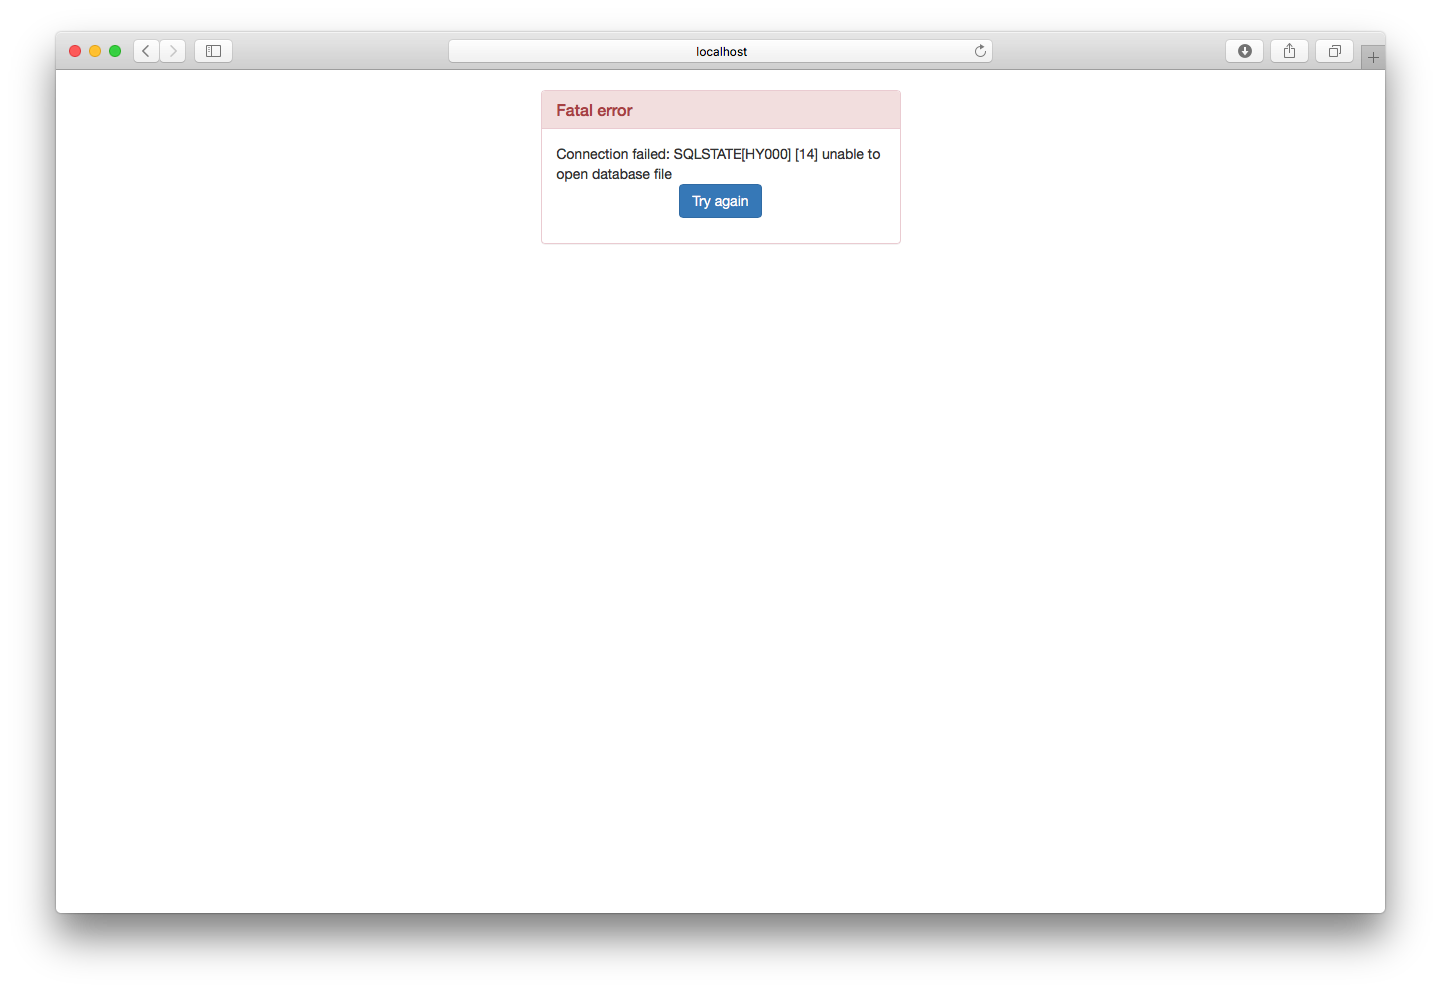
- Open up your website in the browser.
- If you see a prompt with a fatal error about the database file, navigate to the web root directory and add Read/Write to the “Everyone” group on the folder app/db with the “Get Info” window.


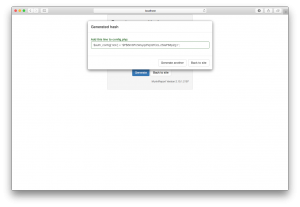
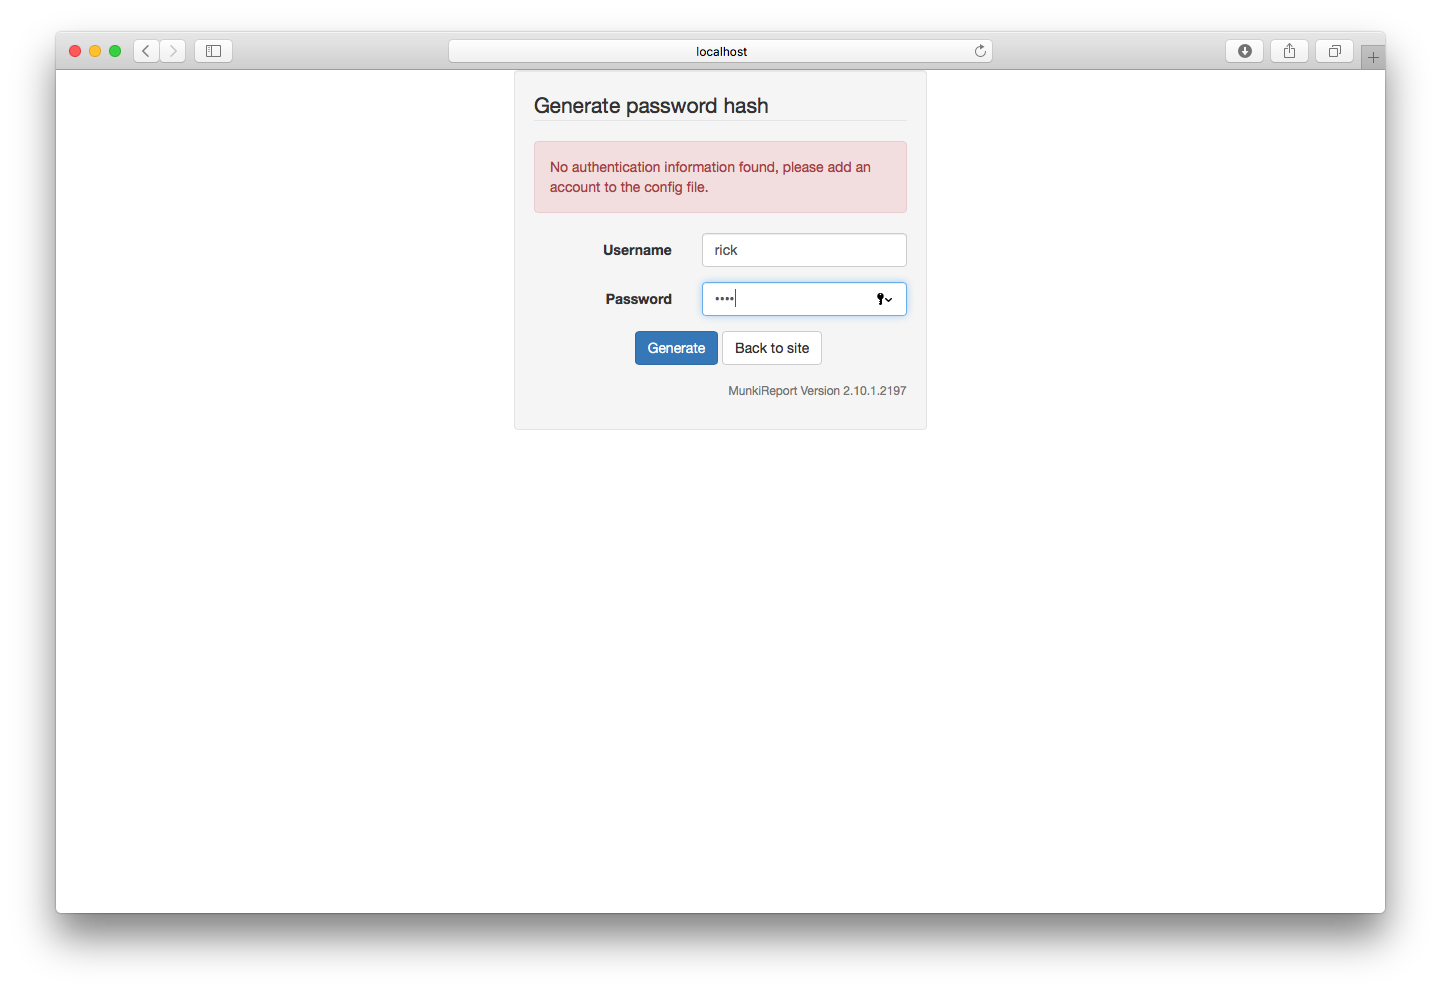
- You’ll now create the first user account for your site. Fill in your desired username and password and press the Generate button.
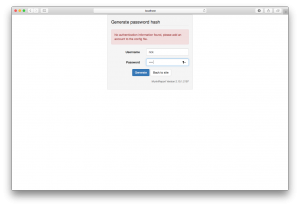
- Copy the line generated and paste it into config.php. Save config.php.
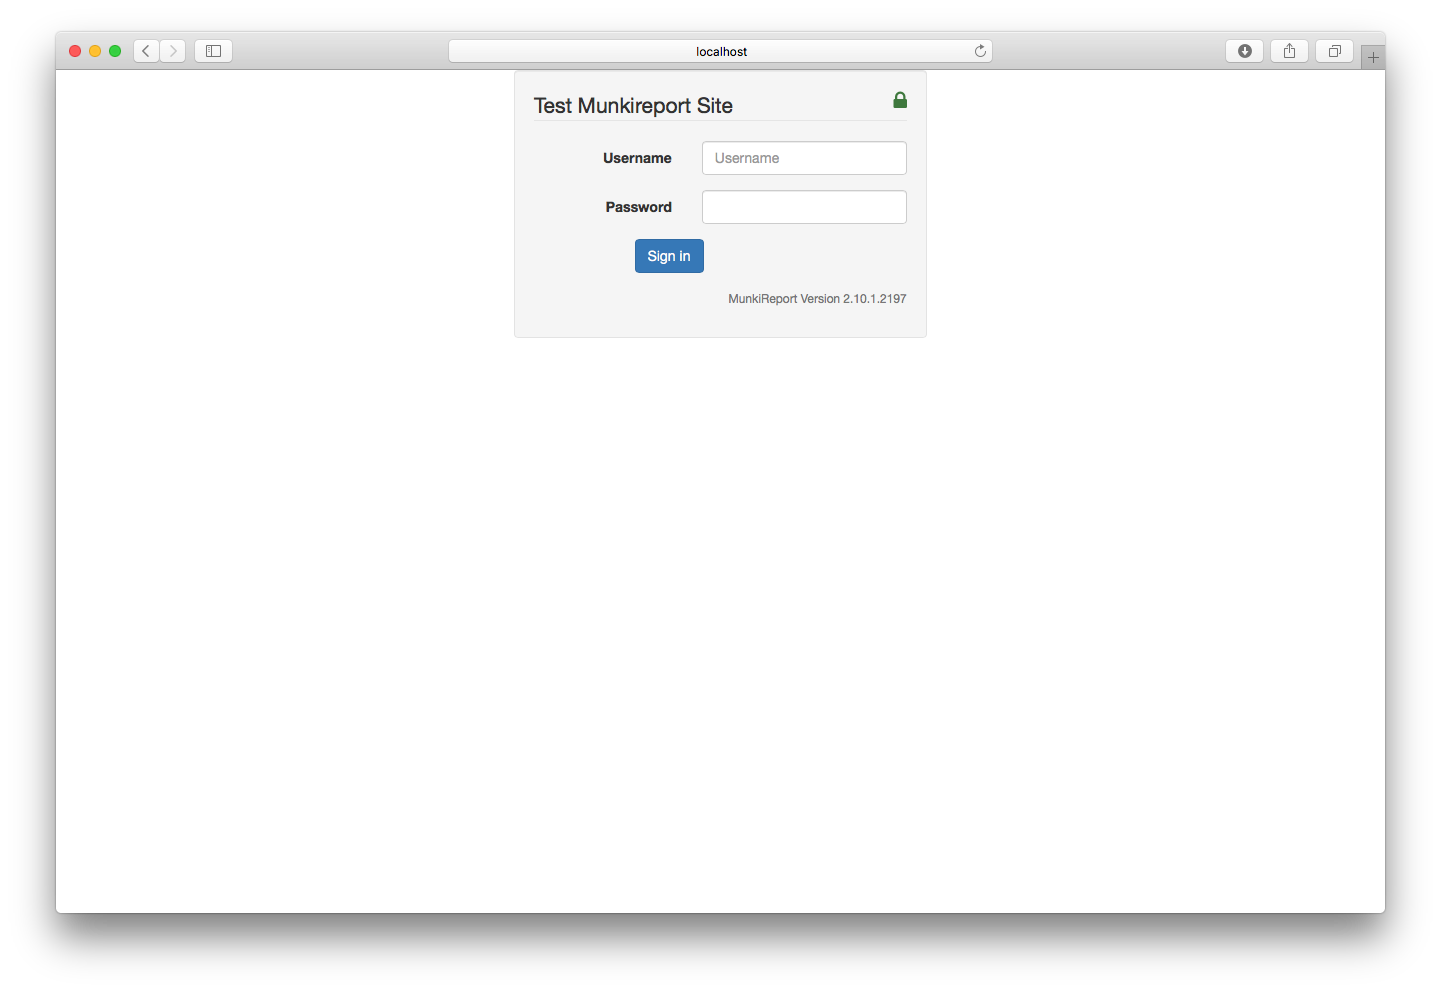
- Re-load the munkireport-php site in your browser and you should now have a login prompt! Use your credentials to log in.

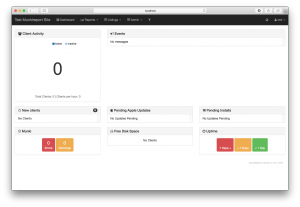


Congrats! You now have a working MunkiReport-PHP installation on your server! You can finish up by adding clients using the instructions on the wiki.